This is something I have been wanting to do for some time. Lets call it a little experiment. I took a similar shot firstly on my I-phone, as is, then on my camera, as is, and finally the camera version edited in Lightroom to compare the results.
Of course it’s always personal opinion about which is the best and that’s what really makes photography so great. There is never a right or wrong, which is why I think you always have to try and achieve what you like, not what you believe will be popular – often the popular version can surprise you. Some people like straight out of the camera, natural. Others oversaturate their pictures to get really rich colours, or even go the other extreme and under-expose to get that dreamy washed out kind of shot. Personally I always try and keep fairly true to life, but highlight the colours. I am always trying to achieve rich colours whist hoping to border on keeping the picture realistic.
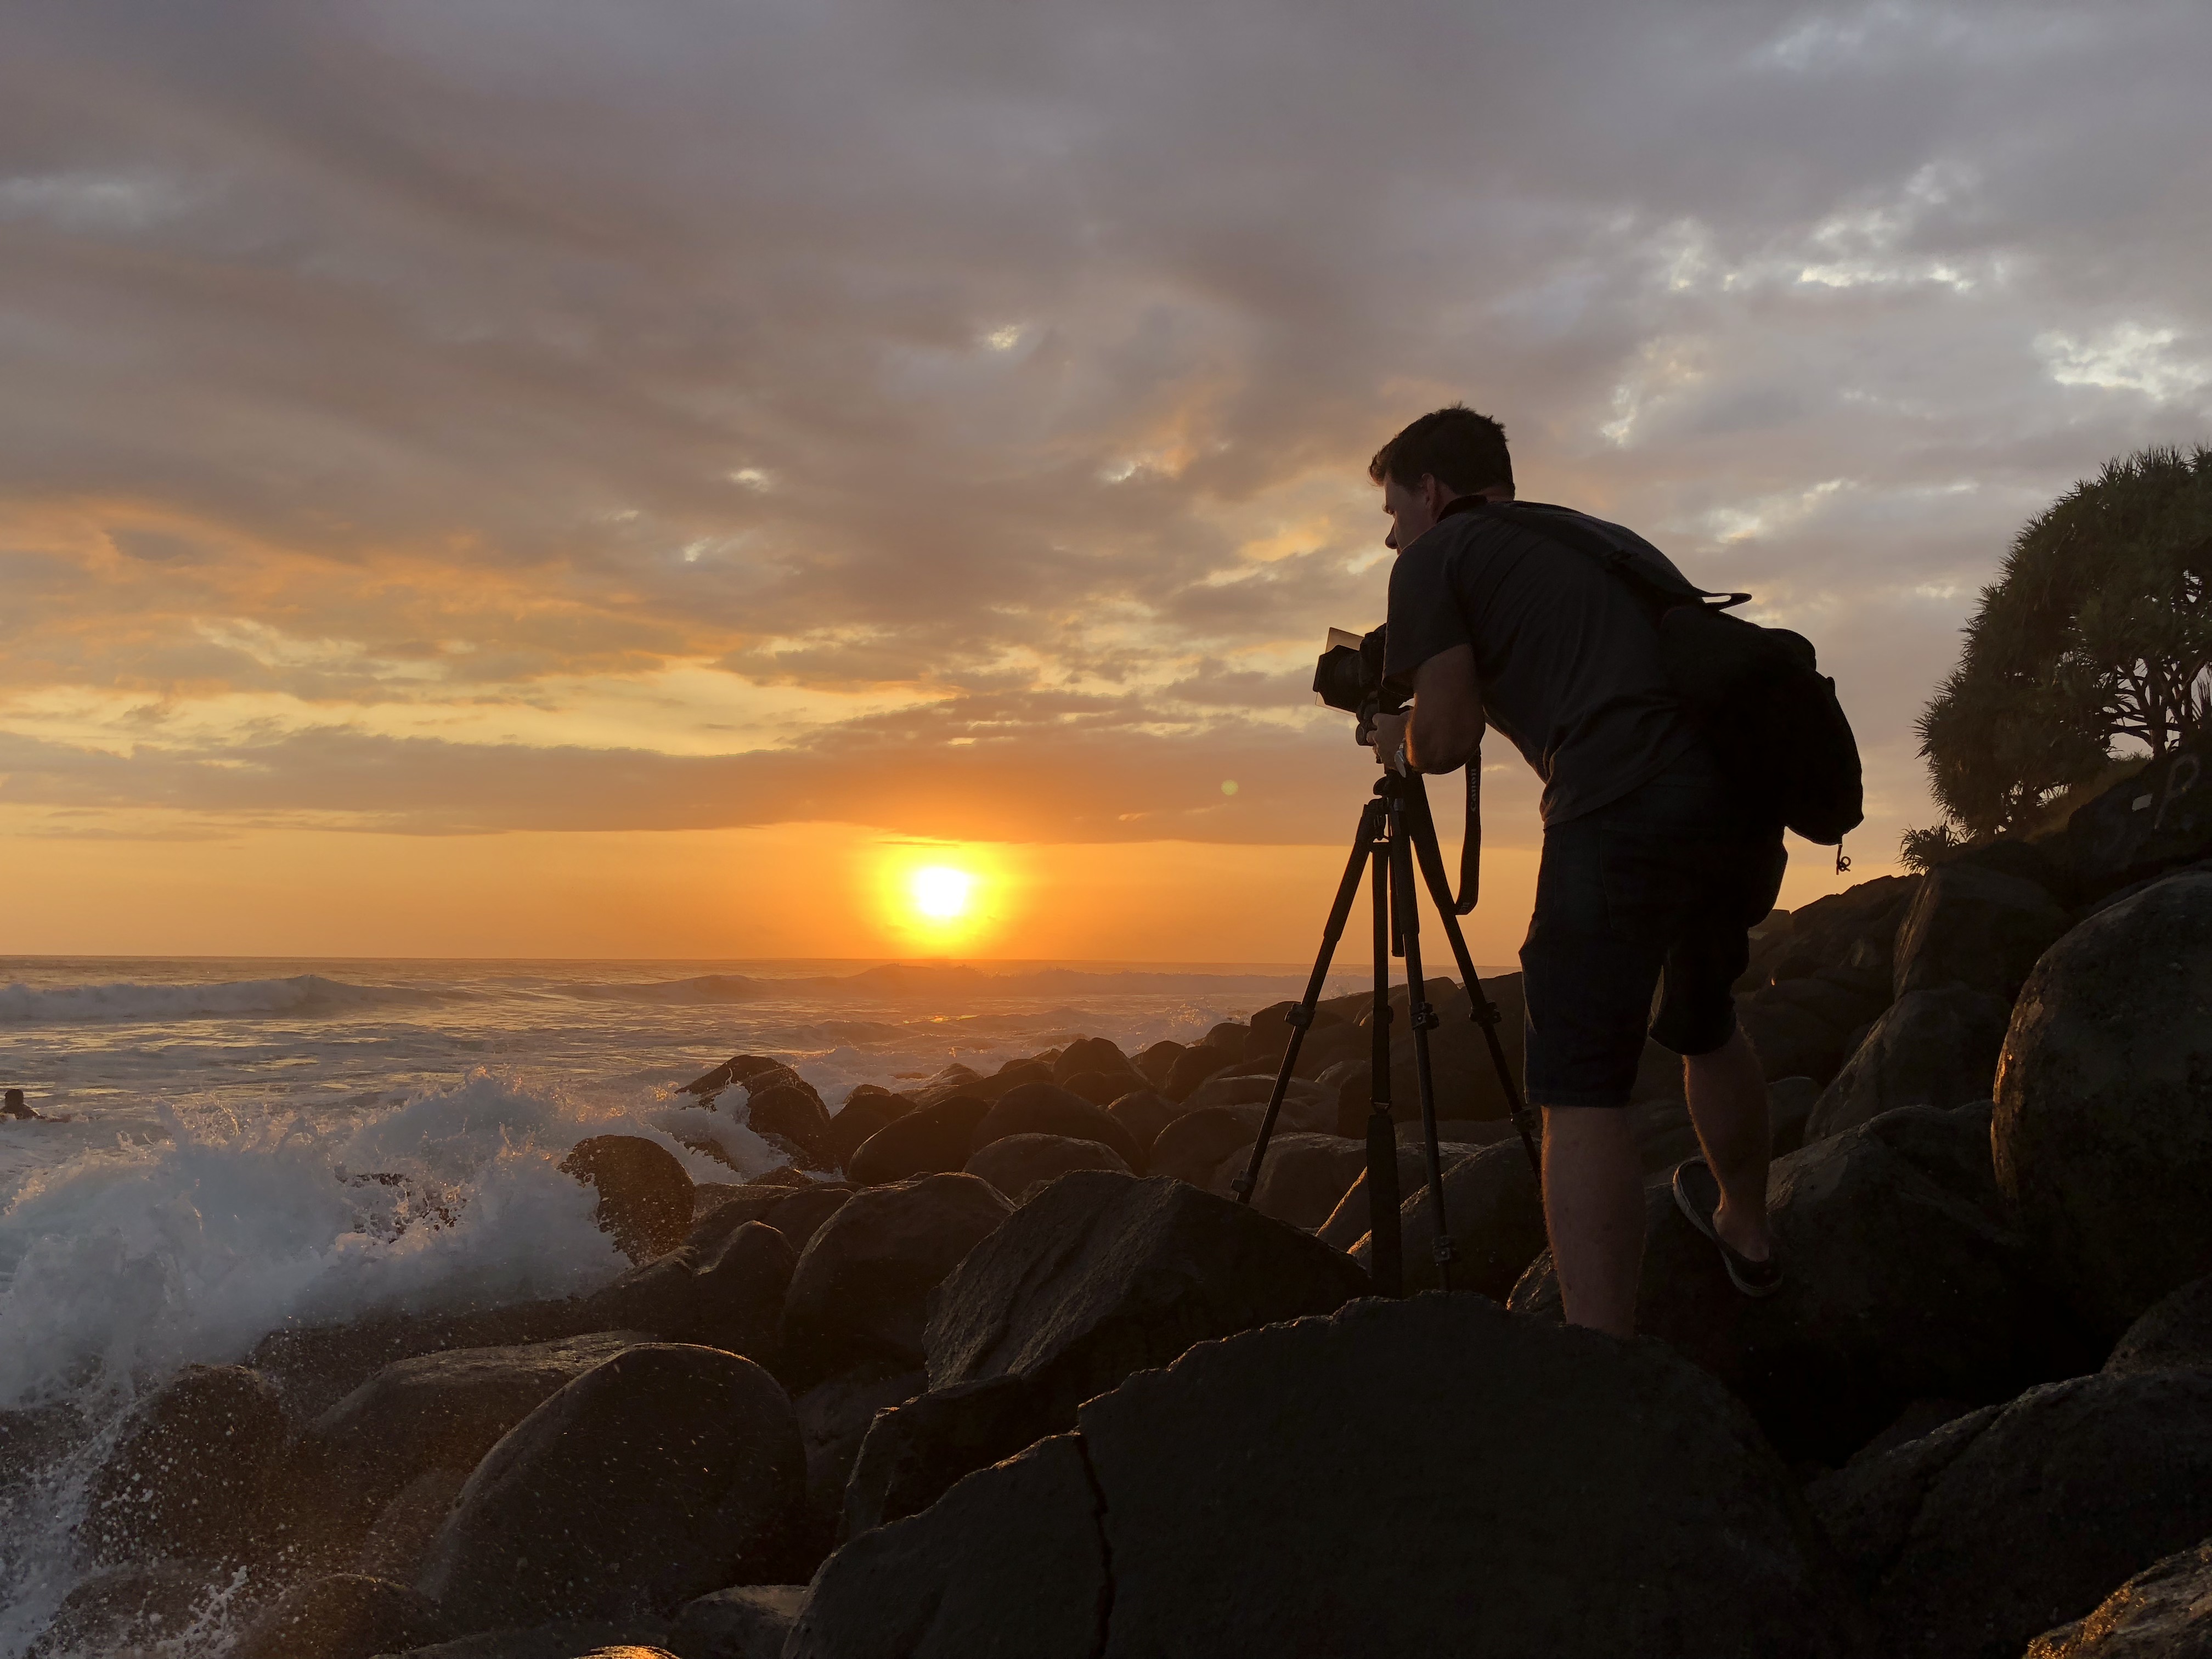
i-Phone Photo
For this particular shot, as far as composition goes, the sunrise was nice and the colours were naturally really rich oranges and yellows so I had a lot to work with. However I did want something “in” the photo to create interest. I love the silhouette style and if you follow my Instagram (@julesingall), you will see that I use this style a lot.
Unedited Camera Photo
So how did I approach this. Firstly, I used a zoom lens 70-200mm so I could stand back and get a better depth on the shot. I hand held to get a fast shutter speed, but this also meant increasing the ISO to 500 and reducing the aperture to 5.6 to be able to do that. The light was already low so these were the only ways to achieve a shutter speed of 1/400 sec. Often, you don’t have the luxury of choosing whatever settings you want. Ideally, for landscape I want ISO 100 to have a really clean, crisp image with minimal grain. Shutter speed at least f11 and normally as high as possible to get a long exposure, but again, depending if I’m using a tripod and what “movement” I want in the shot. For a silhouette, the frame has two vastly different exposure areas. To have both in correct exposure, you would use a graduated filter (whereby the filter darkens the bright part of the picture to allow correct exposure on both), however for a silhouette, I want to underexpose the foreground so it’s completely dark and then expose correctly for the sky.
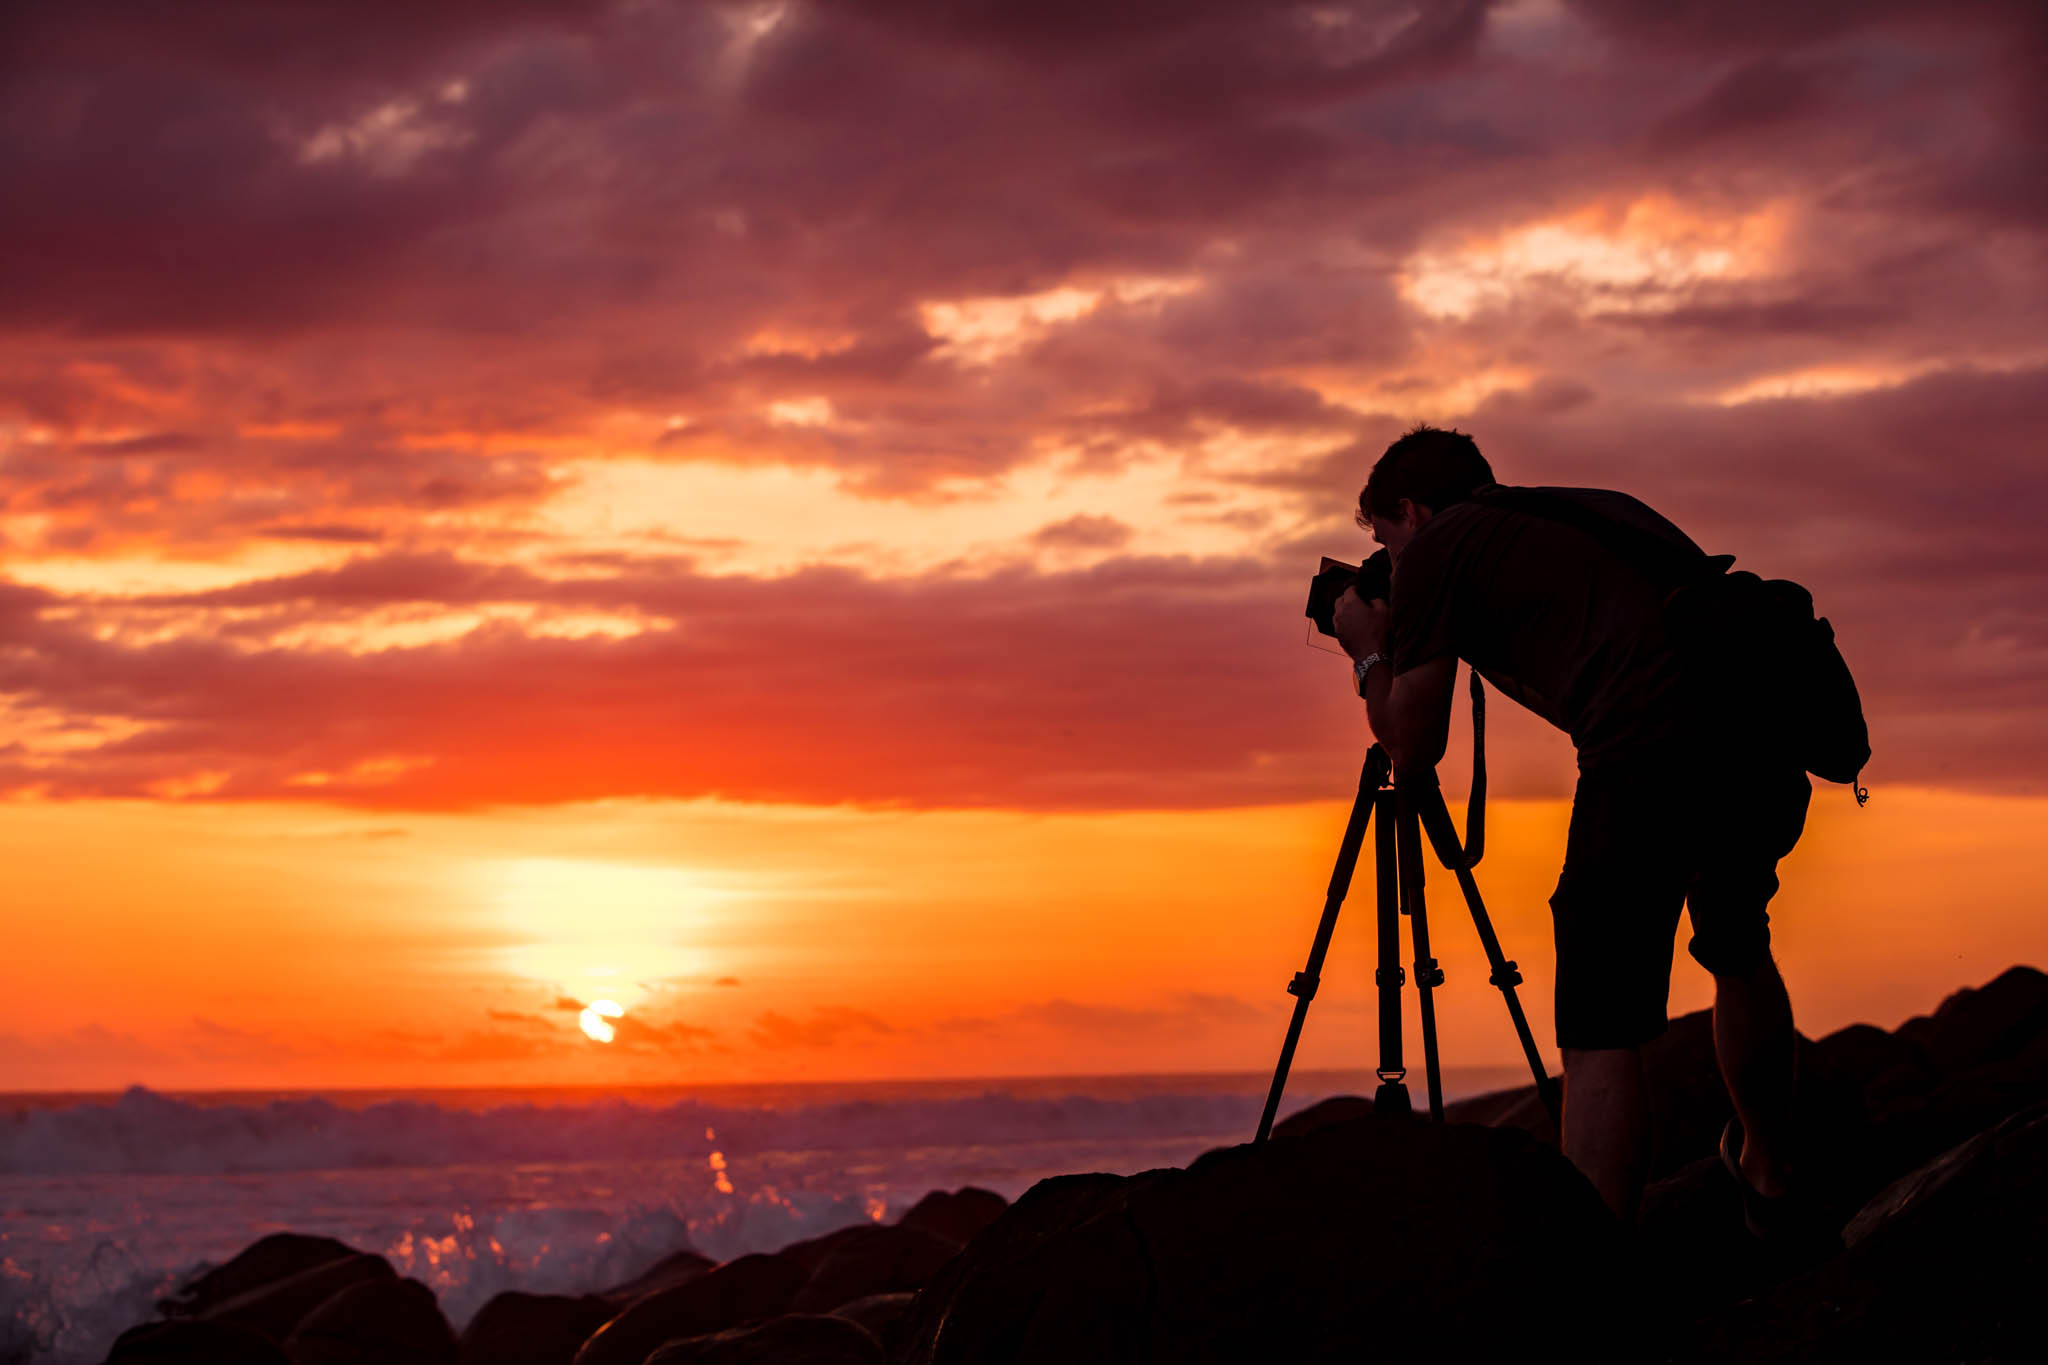
Lightroom Edited Photo
The edited version of this shot I increased the contrast to try to highlight the silhouette. With a cloudy sky, I always take the highlights down to the maximum of -100 to bring back the detail in the light area of the clouds. I increased the clarity and vibrance by 10 – just a small amount and then increased the whites slightly and decreased the blacks slightly.
You’ll notice there isn’t a great difference between all three pictures. They are fairly similar. Personally, the modern day i-phone is pretty impressive, and on a recent ski holiday, I only shot on my phone (mostly due to portability). There are limitations to an i-phone picture obviously with quality etc, but if you are only shooting for “happy snaps” and to post on social media, they’re pretty good. Personally I still prefer the camera shot, but I think the more I take photos, the fussier I get with what I am trying to achieve.
Nothing of what I have said is “the right way”, in fact, some would probably correct me on some of my methods. However it has given me the result I was trying to achieve and thats what is important at the end of the day. Hope this helps!